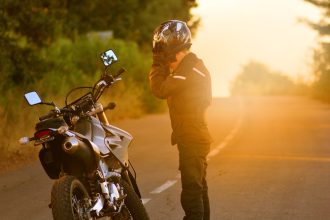
The other day I decided to paint an old helmet of mine that was a bit battered and bruised. I saw a helmet that a friend of mine had done, that turned out much better than I have expected. So I decided to give it a go.
After doing some research and checking out a LOT of videos on Youtube. I came up with the following tips and put together this little guide. If anyone else out there is thinking of the same thing, enjoy and have some fun.
Why paint your helmet in the first place?
Here are a few common reasons why you might want to pull out the tape and spray gun and get started painting your motorcycle helmet.
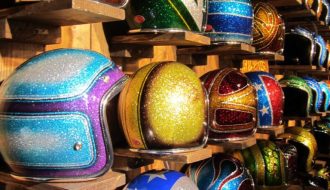
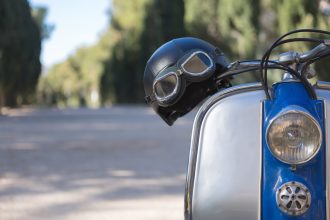
- Looking Good. Looking cool on the road is what most riders want. A fancy motorcycle makes you stand out on the road, and helps improve your look. If you own a standard helmet (that comes painted in common colors) and you want a super unique look, then re-painting is an option.
- Matching Paint. Some riders want to match the color of their bike, so having the helmet painted the color of their pride and joy, just makes perfect sense.
- Re-Painting Old. If you’re like me and your helmet is tired and faded, painting helps you give an old helmet a new facelift. This saves you from the hustle of having to spend money on a new helmet. A helmet with many cracks and peeled off paint lowers your self esteem because it reflects on your sense of style.
So, whatever your reason, it is quite common to put some new paint on an old helmet. You certainly won’t be the first nor the last rider to do so. It is worth noting that, painting is not rocket science. You only need to do things the right way. Let find out how!
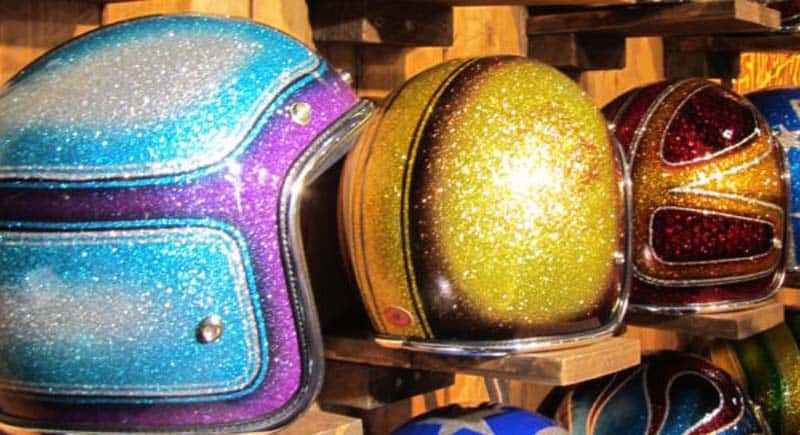
Table of Contents
How to Paint Your Helmet – Quick Step-by-Step Guide
OK, so you have decided to paint your own helmet. You are not taking it to a custom paint shop, you are going to give it a shot yourself.
Here is what you do.
- Acquire all the tools and disposables
- Carefully Disassemble the helmet
- Prepare the helmet for painting
- Masking your pattern – if required
- Applying Primer/Undercoats
- Adding a Guide Coat and sanding smooth
- Applying your paint color
- Add multiple colour – if required
- Adding a Clear Coat
- Unmasking
- Re-assemble your helmet
- Repeat steps 3-8 – if adding multiple colors
1. Get all Tools and Materials Ready
You will require the following materials before getting started:
- Airbrush/Spray Gun
- Reference picture and Stencils (…if doing a pattern)
- Masking tape
- 400 grit sandpaper
- Scotch-Brite abrasive pad
- Primer and flat black quick coat
- Matte spray paint
- Clear coat
- Knife
- Latex gloves
Pro Tip1: You should be very careful when buying paints because some may contain chemicals that can damage the base material of the helmet. It’s therefore advisable to purchase paint from a renowned outlet because they know a lot about paints and will recommend the best paint.
Pro Tip2: Painting should be done in a clean area because the paint can land on other items that are close to your working area. You should place your bench at a space that’s not occupied by other things. A dusty environment is also a no no. Dust can stick on the wet paint and result in a shoddy job.
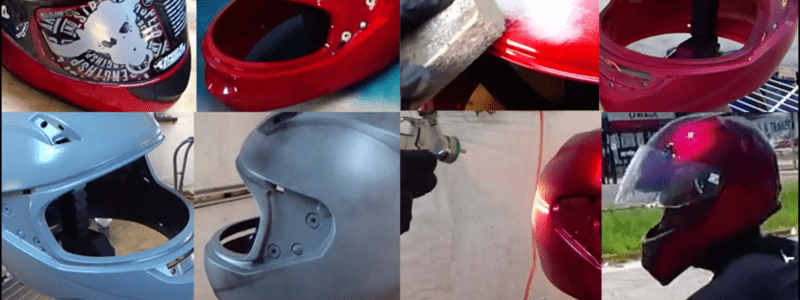
2. Dismantle your helmet
Start by disassembling the parts that are removable such as the lens, screws and the strap that goes under your chin. Carefully remove the interlining and set aside all the pieces, preferably away from the area you will be painting in. You don’t want to get any paint on these parts.
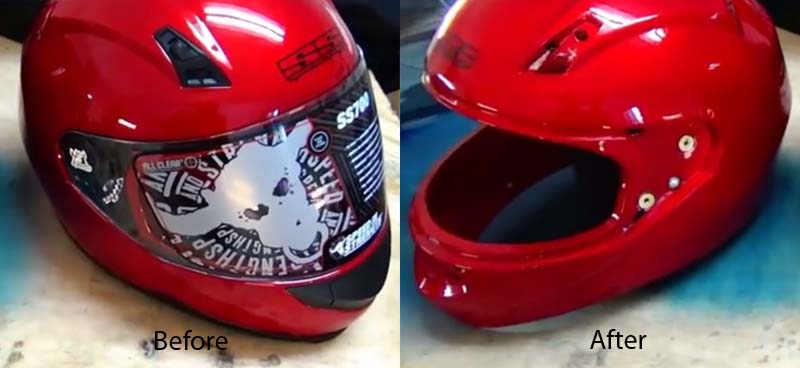
Image Credit: SprayWayCustoms
Watch this being done here…
Pro Tip: If you are not able to remove all of the inner lining from your helmet, you will need to do some masking prior to painting.
3. Preparing the Helmet
Clean the surface of the helmet with a basic cleaning detergent to get rid of any grease. Since your hands can leave marks on the painted surface, you should wear latex gloves.
Pro Tip: Check the helmet for any damage. As long as the base of your motorcycle helmet is still intact, there is no limit to the number of times that a helmet can be re-painted.
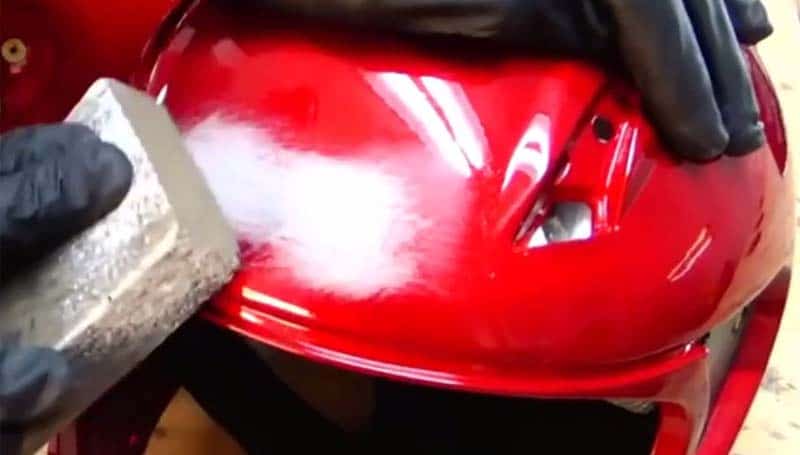
Image Credit: SprayWayCustoms
Watch the prep section here…
- Remove Stickers. Remove any stickers by pealing off or applying heat to them with a Hair Dryer or Heat Gun.
- Sanding. Remove the old paint and sticker glue, by rubbing a 400 grade sand paper material on the helmet. Painting on top of old paint results in a horrible outlook. For best results, run the sandpaper along the grain but not against it.
Pro Tip: Completely remove any shiny surface from the existing paint with your 400 grit sand paper or ScotchBrite abrasive pad, otherwise your new paint wont stick.
Once you’re done with sanding, take a piece of cloth and use wax and grease remover and use it to wipe out any dust that may be on the helmet.
4. Masking your Helmet
If were not able to remove all of the inner lining from the helmet, you might need to do some masking up. Masking tape comes in handy when you want to cover the areas that you don’t want to be stained by the paint.
Getting paint off your inner lining is not how you want to spend your Sunday Afternoon.
Pro Tip: Simply get some old newspapers, scrunch enough of it up into a ball and stuff it inside the helmet. Use the masking tape to help fasten the newspapers so that they don’t fall off. Use the knife for cutting the tape into the desired shape and length.
5. Add the Primer Undercoat
Start by painting the surface with an undercoat. Once you’re done, take a break to give the undercoat ample time to dry. Applying your design while the undercoat is still wet is strongly discouraged.
Pro Tip: Apply at least 2-3 coats/layers of primer. Avoid spraying beyond the masking tape because the paint can be absorbed by the paper and stain the base.
Leave the helmet and primer to dry overnight.
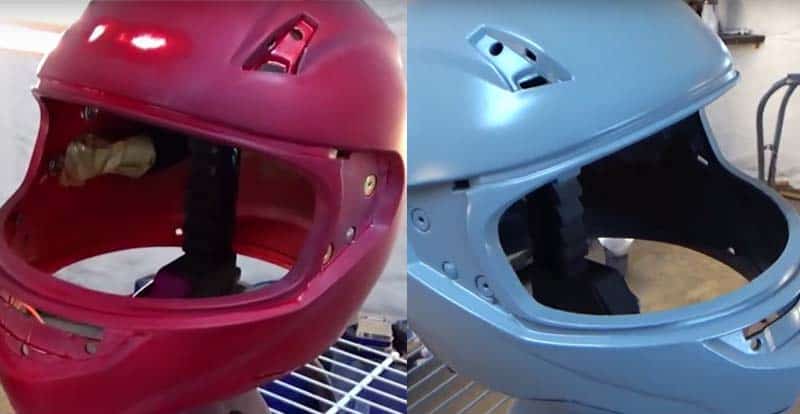
Image Credit: SprayWayCustoms
Watch the Primer section here…
6. Adding a Guide Coat
Then take the dry helmet and a spray can of cheap flat black quick coat and lightly mist coat the outside of the helmet. Allow to dry.
Once the guide coat has dried, take some 400 grit wet-n-dry sand paper and a block, and soak in a bucket of warm soapy water.
Use the block to carefully sand the helmet down smooth.
Pro Tip: You can tell if it’s not smooth because the black guide coat stays black in areas where it is not completely smooth. Keep sanding until the guide coat disappears, not the primer.
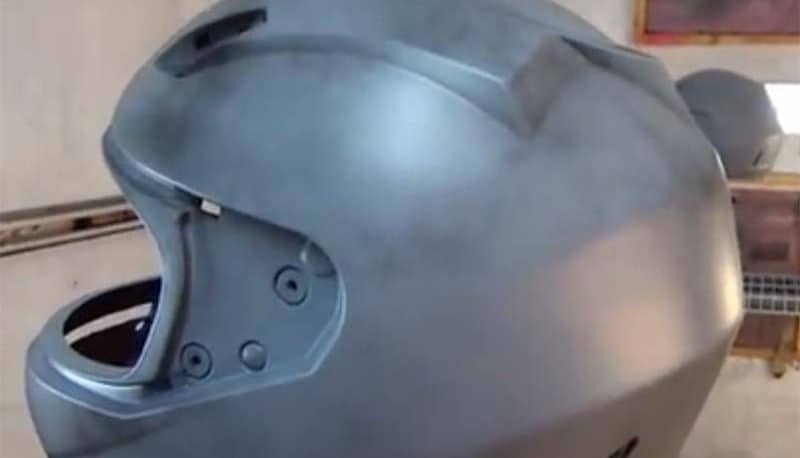
Image Credit: SprayWayCustoms
Watch the Guide Coat and Sanding here…
Pro Tip: Sand lightly near corners, as it is really easy to sand right through the primer down to the original colour. These corners is where the paint will be the thinnest.
Once you’re done with sanding wash it clean. Then use wax and grease remover and a piece of cloth to wipe out any dust that may be on the helmet.
7. Painting the helmet
We have finally reached the best part. After all of the work you have done, it is now time to see it all come together and put some color on the lid.
Before applying paint, wipe down the helmet to remove any dust particles. Mix your paints (if you are using a professional spray gun). Shake your cans if you are using an Aerosol Spay Can.
Pro Tip: Start spraying away from the painted area and come onto it with and even distance and at a constant speed. Don’t stop in the middle, as you will get runs. And stop spraying as you run off the painted area. Start spraying again as you come back over again. Right to left the left to right. And repeat this motion until you have an even coat across the whole helmet.
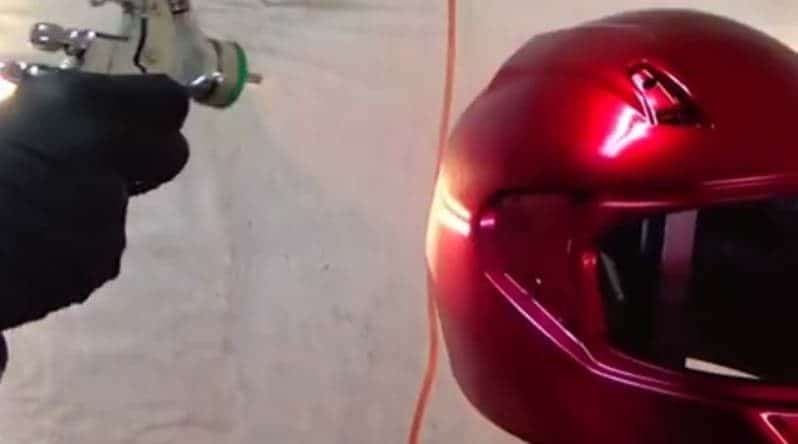
Image Credit: SprayWayCustoms
Watch a Pro Spray Painting a Helmet here…
Pro Tip: Make sure you have enough paint to do at least 3-4 coats.
Once you have done the first coat. Give it some time to dry and apply another coat. Keep doing this until you have a beautiful colored helmet.
8. Applying Multiple Colors
Applying various colors on the same helmet can be a daunting task, especially if you don’t know how to go about it.
- If you are painting a pattern: place your reference picture close enough such that you can see it without straining your eyes.
- Sketch out your design on the helmet.
- To avoid mixing colors, use masking tape around the outside of the areas you want to paint.
- Leave the part that you want to paint uncovered.
- Cover the rest of the helmet with tape and paper to stop any over-spray.
- Use the same spay technique shown above to paint your colored area.
- Since you can’t cover a wet surface, you need to wait until one area is properly dry before moving to the next part.
- Once the paint has dried, you can remove the masking tape and papers on the part that was not exposed and cover the part that you have already painted.
The process should be repeated until you have painted the entire helmet with your favorite colors.
Check out these Bespoke Custom Airbrush Designs that will blow your mind
9. Applying the Clear Coat
A clear coat of paint protects and eliminates the need for buffing. Apply the clear coat in the same way as you would apply the main colour. Up to four layers of clear coat should be applied to enhance the depth of the paint.
After the final layer, the clear coat should be left to dry for approximately 24 hours. The helmet should then be smoothed with a 1500 grade sand paper to leave a nice finish.
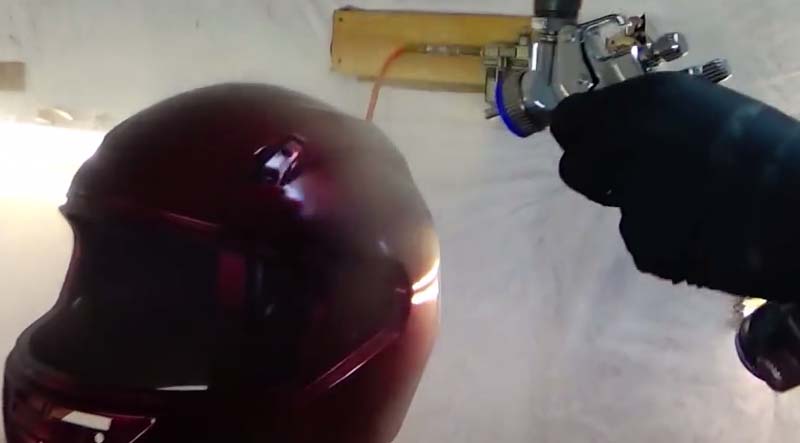
Image Credit: SprayWayCustoms
Watch the Professional Apply the Clear Coat here…
10. Unmasking the Helmet
After you have completely finished, you should then remove the masking tape. A clean, dry cloth should be run under the surface that was covered by the masking tape to get rid of any debris.
Pro Tip: The masking tape and the papers that were used should be peeled back gently to prevent the fresh paint from being removed.
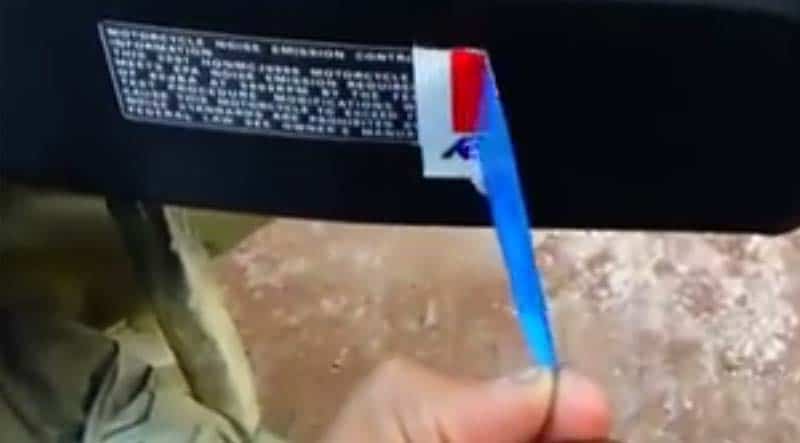
Image Credit: SprayWayCustoms
11. Re-Assembling the Helmet
Only once your helmet has fully dried, should you start to reinstall all the parts that were removed into their rightful places. If you are experiencing any difficulty, you should refer to the owners manual that came with your helmet.
Make sure to tighten all the screws where necessary to make sure they don’t fall off while you’re on the move.
The finished Product
You may be wondering when the picture of my helmet is. Well, I would prefer to show you how it can be done properly, as seen by the example of the Merlot Red Helmet that SprayWay’s had finished (and the matching bike). Rather then the result I got from my attempt.
Although my helmet does look a lot better that the beat up skid lid that I started with. Which I suppose is the point.
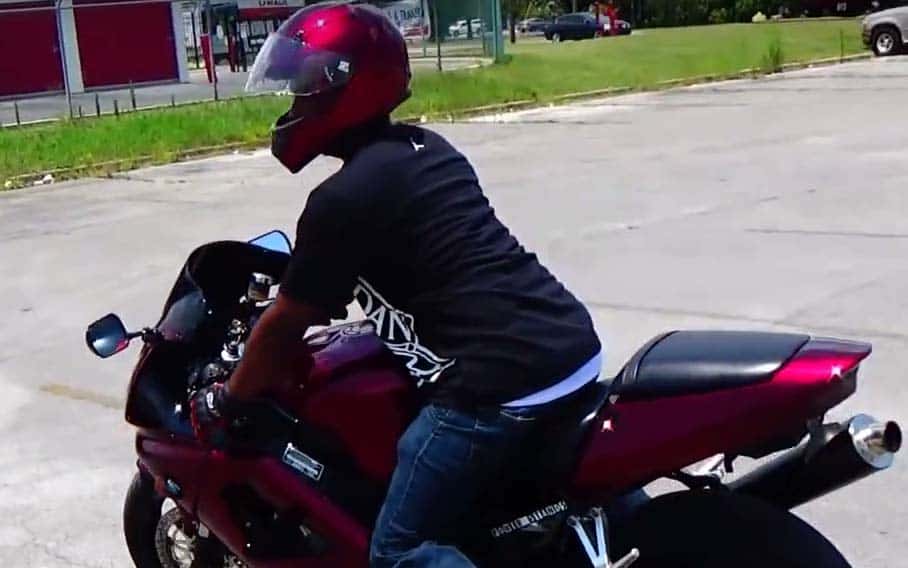
Image Credit: SprayWayCustoms
If you have painted a helmet lately, please send us some pictures. If you have any tips and trick for getting a better result, leave a message in the comments section below. We would love to check it out.
We hope you find this information helpful. If you would like to support this site, you can by purchasing through recommended links on the page. Should you decide to purchase, we may earn a small percentage of the sale at no cost to you.
Thank you for your support.
Looking for a Replacement Helmet? Here’s a Recommendation
| Best Full-Face Motorcycle Helmet | Price | Rating |
|---|---|---|
| 5/5 rubber chickens | ||
| 4.8/5 rubber chickens | ||
Related posts:


2 Comments