As a regular rider, you’re likely to experience a dirty or stinking helmet after having several rides. In my case just one ride is enough.
Having a smelly helmet doesn’t mean that you don’t observe your personal hygiene. This is because the hair and the skin sweat at the same time, particularly during hot weather.
Some claim they don’t mind this funny odor, but for those who want to keep their helmet clean and smelling good, occasional clean-up is highly recommended.

A lot of people have asked us about the various techniques for cleaning the inside and the outside of their helmet.
So we put together a comprehensive guide to motorcycle helmet cleaning covering the do’s, don’t do’s and practical tips on how to take care of your helmet.
Each section has a different approach although helmets with a removable inner lining are much easier to clean.
Let start with the basic stuff.
The basic stuff
There are a few common sense things that you should have at your fingertips to take care of motorcycle helmet and keep it clean.
The most basic thing is the manufacturer’s tag detailing the dos and don’ts to make the cleaning process seamlessly.
Others include helmet maintenance and cleaning guide.
Because a good number of manufacturers guide aren’t comprehensive enough, in this article, you will find useful cleaning guides and tips which are applicable for virtually all types of motorcycle helmets.
The basic do’s and don’t of helmet care

Knowing the dos and don’t to take care of your helmet is vital comes in handy as far as helmet maintenance and cleaning are concerned.
Most people use the wrong care techniques while handling their helmets which causes more harm than good.
Do
- Make effort to be wearing liners such as, a bandana or skull cap. These liners lower the rate at which the body oils and sweat is absorbed by the helmet as they take a good proportion of the sweat produced.
- Moving parts of the helmets like the visor hinge should be lubricated with a silicone base lubricant. Be sure to lubricate them frequently to prevent friction which makes your helmet wear out at a faster rate.
- When washing the liner, use a mild soap such as a mild laundry detergent or baby shampoo. Don’t only use water – detergents have a deep cleaning action that removes even the most stubborn stains.
- Waxing using the automotive wax helps protect it from guts, grime and water spots from sticking.
- Use a towel soaked in warm water to soak and loosen stains for a few minutes before wiping them away. Ensure the towel is soft, scratch free and made of microfiber while cleaning your helmet to avoid scratching your helmet.
- Absolute minimal pressure should be used when cleaning the visor and gloss shell to prevent it from scratching or detaching from the other parts.
- Helmets and liners are air-dried although you can be accelerate the process by using room fan when necessary.
- Use automotive polish, such as the Honda polish on the shell of a gloss helmet, especially when the helmet color begins to fade.
Do Not:
- Use any ammonia-based cleaner or glass cleaner on the visor. Ammonia breaks down the polycarbonate lenses and as a result, renders them useless over time.
- Use dryer sheets in your helmet to freshen it, dryer sheets contain harsh chemicals that cause allergic reactions in many people.
- Use any soap with fabric softener in it to clean your liner, it prevents moisture-wicking liners from working.
- Scrub the visor or shell of a motorcycle helmet, especially to remove stubborn bug guts.
- Use any solvent-based cleaner or petroleum distillate on your helmet.
- Use harsh soaps, like dish soap, on your liner or helmet.
- Put your helmet liner on the dryer.

Preventative Maintenance
Bugs should be removed after every ride to prevent them from hardening. Removing bugs regularly makes the cleaning process easier.
The helmet should not be stored near gasoline and avoid dropping the helmet. It’s always good to position that prevents it from falling like in the hand bars of your motorcycle.
Aerate the helmet when you go for a long time without wearing it. Also, remember not to leave gloves or the under amour stuffed inside the helmet.
Coat the shell of the helmet with automotive wax; it acts like a protective layer hence makes cleaning in the future easier
How to clean the helmet
While cleaning the helmet, there are things you have to be mindful about, especially the cleaning procedure and the type of detergent to use.
Washing the helmet’s interior twice a year or after every ride in any harsh conditions ensures the materials and the foam stay in a good condition.

It also prevents skin infections because the helmet sits against the skin. Some of the items needed for helmet cleaning include:
- Warm water source
- Paper towels
- A vessel large enough to submerge the helmet
- A plastic polish
- Mild detergent and shampoo
How to clean the inside of the helmet
- There are two kinds of helmets when it comes to cleaning: those with removable liners and those without the removable liners.
- For helmets with removable lining, the process is a breeze; just remove the cheek pads and lining which are held by Velcro or push-button.
- The next step is putting the removed linings and other bits and bobs into the washing machine and set it in the delicate cycle to ensure they aren’t boiled up.
- When finished, just hang out to dry.
For helmets with non-removable lining
- Remove all removable parts like: cheek pads, neck roll hook, crown liner and the visor.
- Clean the inside of the helmet followed by the exterior.
- Fill the water tub with warm water.
- Submerge the helmet completely into the water tub.
- Add some mild shampoo like baby shampoo into the water after it has completely dampened.
- Scrub the inside of the helmet such as the fittings and the mouth guard gently with your finger tips and ensure that you have removed all stains and odor.
- Rinse the helmet out by submerging it into a tub with warm water.
- Rinse for a couple of times until the water used does not lather or form bubbles but appears clean.
- Place the helmet upside down on a soft surface and allow it to dry for about 24 hours to reduce the chances of mold formation.

Cleaning the outer shell
- Use a mild detergent preferably baby shampoo or even a mild-dish cleaning liquid.
- Wet a microfiber cloth or cotton cloth and put some detergent on it.
- Gently wipe the shell, clean the vents and joints with cotton swabs dipped in the cleaning solution.
- After cleaning the bugs and the dirt, use another wet cloth to wipe the helmet.
- Once dry, use an automotive polish (Honda polish) on the shell to restore its shinning state.
- A coat of automotive wax can be used on the helmet. It gives the helmet a protective coating which makes cleaning in the future easier.
Cleaning the visor
While cleaning the visor, a paper towel is used together with warm water plus a mild detergent. Clean the visor as outlined below.
- Wet a paper towel with warm water and shampoo.
- Place the wet paper towel on the outer part of the visor and let it stay there for like 10 minutes to dampen and loosen any debris that may have accumulated during the ride.
- Remove the damp paper towel on the outer visor and clean with a new clean paper towel.
- Using a damp paper towel soaked in a mixture of warm water and shampoo, clean the inner part of the visor by gently patting. This should be done gently to avoid removing the coating applied by the manufacturer such as the anti-fogging coating.
- Pat the inside of the visor with a clean paper towel.
- Clean the outside of visor only using a plastic polish.
Conclusion
Cleaning your motorcycle helmet isn’t as complicated as you may think as long as you have a detailed guide.
It is even easier when you already know the dos and don’t that will reduce the formation of stains and prevent bugs from hardening.
Be sure to keep this guide in mind and make effort to be cleaning your helmet regularly as outlined in this article.
This will go a long way in ensuring your helmet is neither nor smelly. At the same time, it prevents you from skin infections, especially if you share your helmet with friends or other family members.
Are you ready to have a clean helmet? Then be sure to give this guide a try today.
We hope you find this information helpful. If you would like to support this site, you can by purchasing through recommended links on the page. Should you decide to purchase, we may earn a small percentage of the sale at no cost to you.
Thank you for your support.
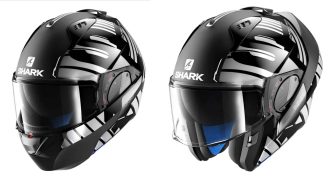
Looking for a Replacement Helmet? Here’s a Recommendation
| Best Full-Face Motorcycle Helmet | Price | Rating |
|---|---|---|
| 5/5 rubber chickens | ||
| 4.8/5 rubber chickens | ||

